
Manage registrations from customers
Every time a potential partner fills out and submits a B2B registration form on your storefront, their application automatically arrives on your management list. This workspace allows you to review business profiles, approve or reject wholesale requests, and organize your B2B customer records in one place.
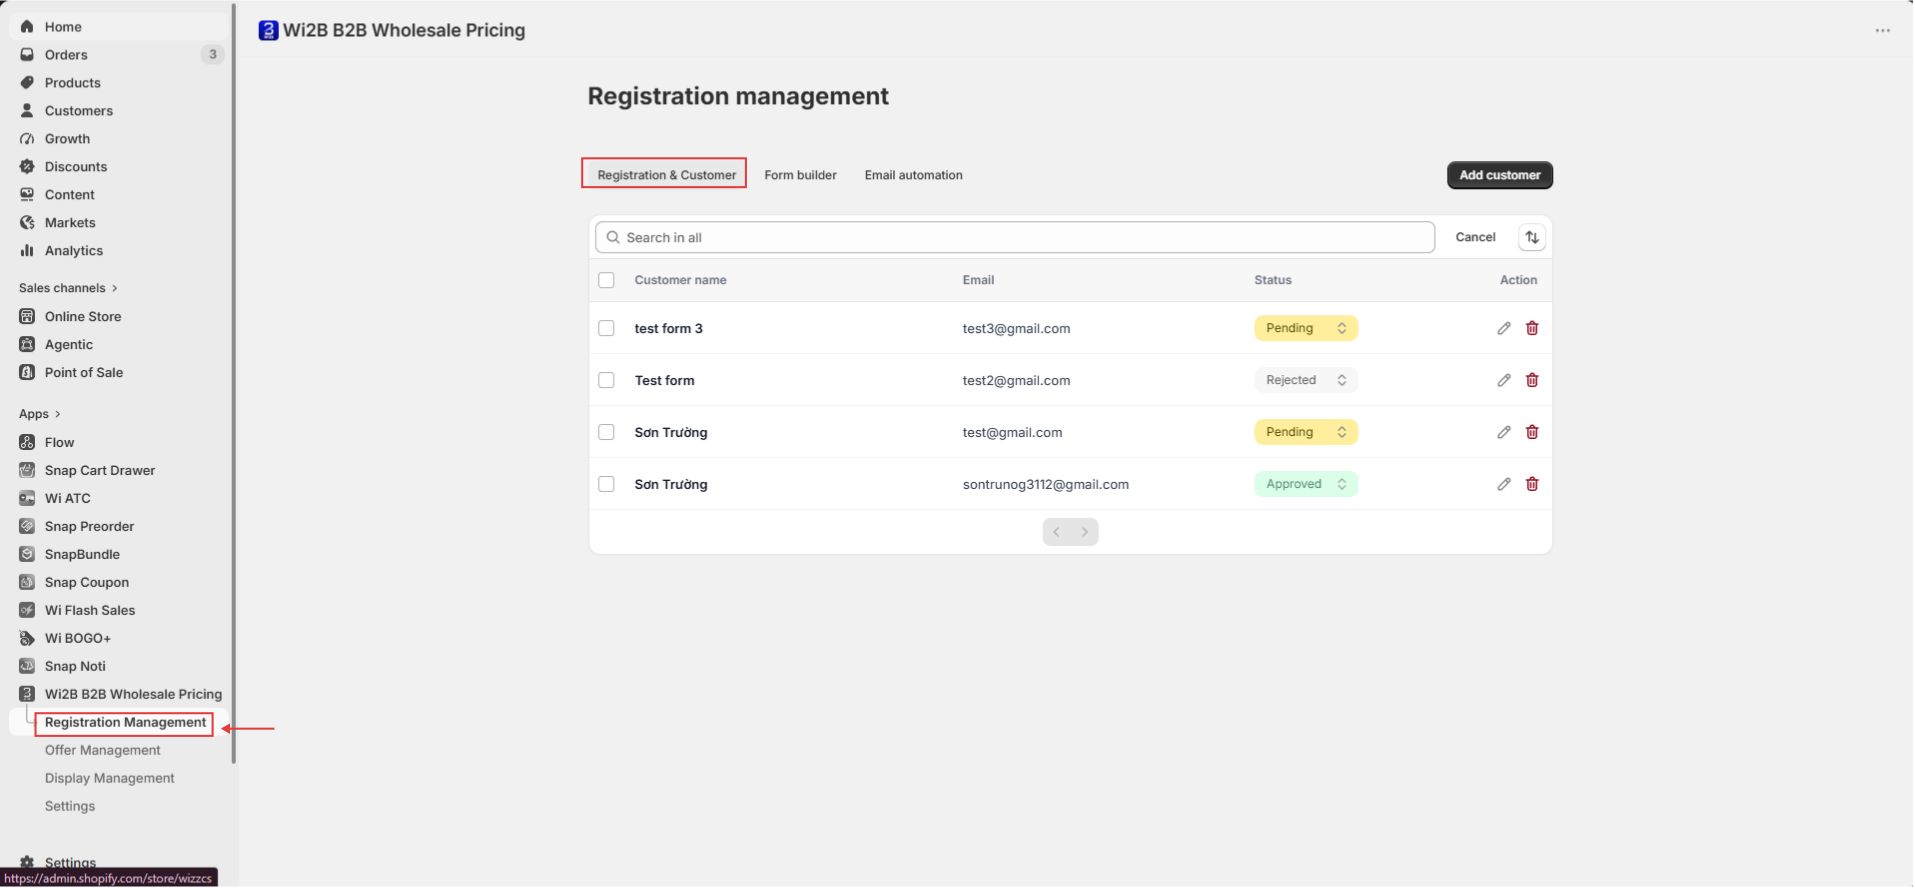
To access it, open the Wi2B B2B Wholesale Pricing app from your Shopify Admin > select Registration Management from the left navigation menu > by default, the app will open the Registration & Customer tab.
1. View and Filter the Registration List
On the main dashboard, you will find the complete list of registrations with columns displaying: Customer name, Email, Status, and Action.
To quickly group and view applications by their state, click the filter tabs located above the table:
- All — Displays every registration request.
- Pending — Requests waiting for your review.
- Approved — Approved partners who currently have wholesale access.
- Rejected — Declined applications.
The number next to each tab provides an instant snapshot of how many requests are in that specific state.
2. Approve or Reject Individual Requests
You can change the status of any partner registration directly within the table:
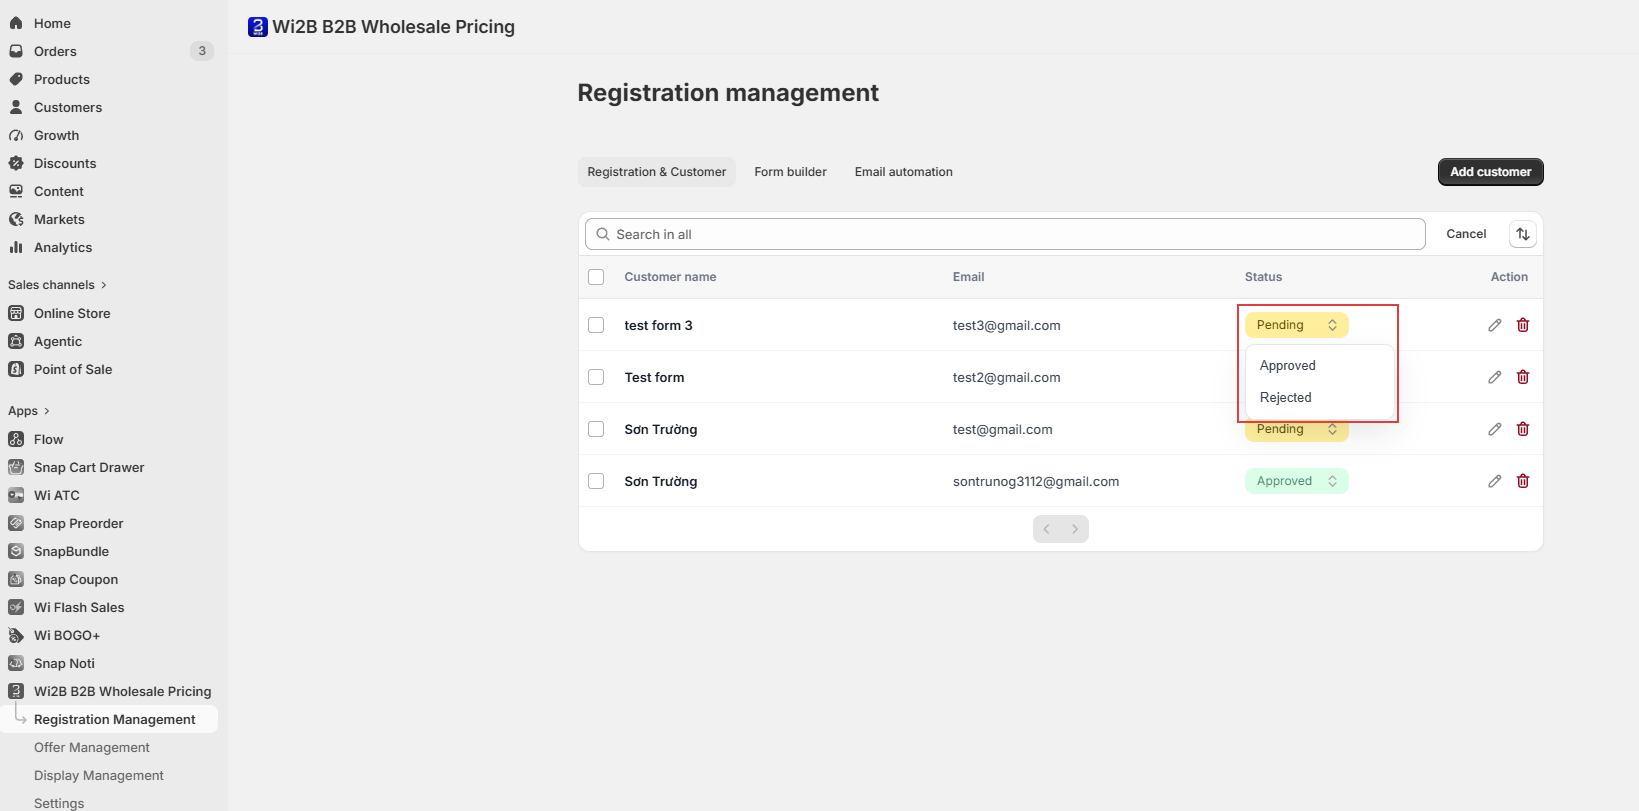
- Click on the current status badge in the Status column of the target customer's row.
- A dropdown menu will appear with the following options:
- Approved — Approve the request, immediately granting B2B status and permissions to the customer's account.
- Rejected — Decline the request.
- Select your choice, and the system updates the customer status instantly.
3. Bulk Actions
If you need to approve, reject, or delete multiple applications at once, use the bulk selection tool:
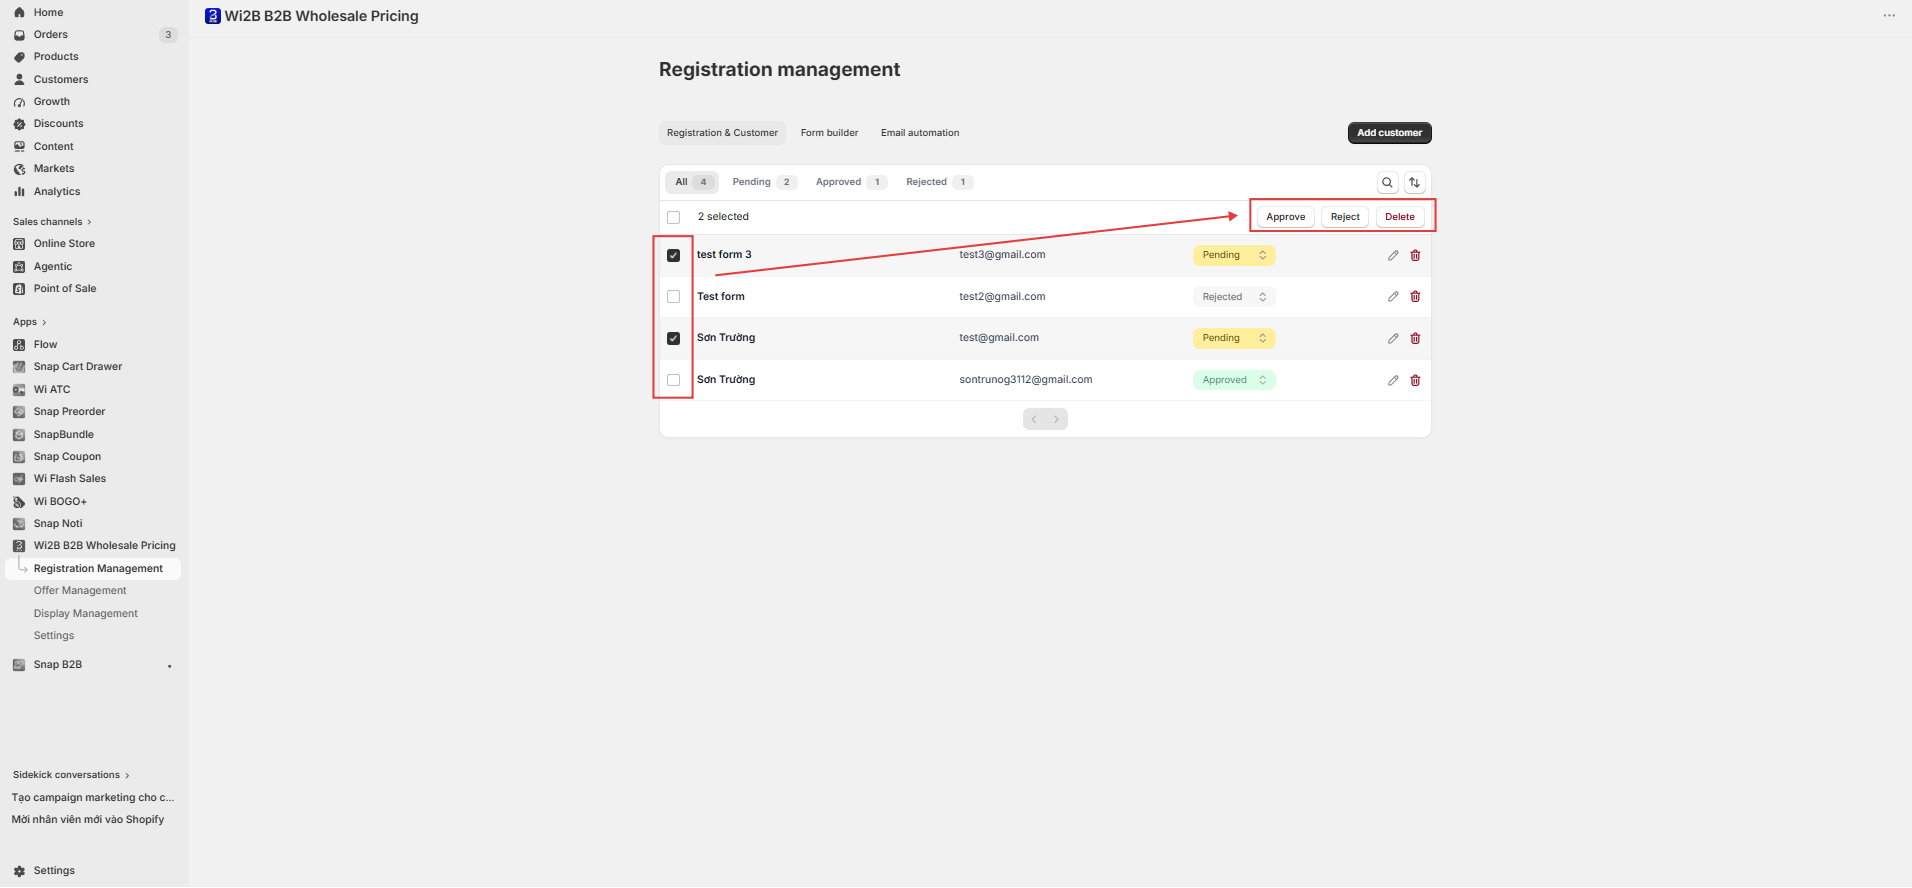
- Check the box on the left side of the rows you want to update (or check the box in the header row to select all visible records).
- The bulk action bar will appear at the top of the table, displaying the number of selected records along with three action buttons:
- Approve — Approve all selected registrations at once.
- Reject — Decline all selected registrations at once.
- Delete — Remove all selected applications from the list.
4. Search and Sort the List
- Search: Click the magnifying glass icon at the top right of the table to open the search bar. Type the name or email address of a partner to filter the list instantly. Click Cancel to close the search bar and display the full list again.
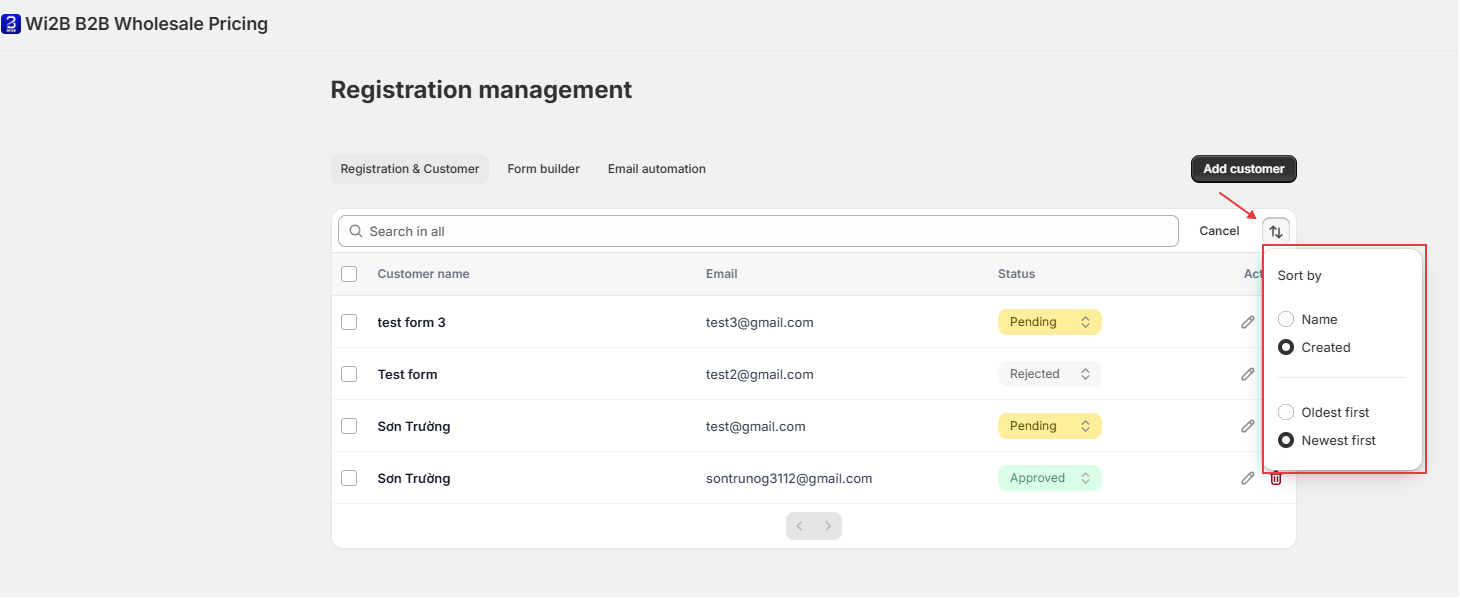
- Sort: Click the sort icon (two opposite arrows) next to the search icon to open the Sort by settings panel:
- Sort parameters: Sort by Name (alphabetical) or Created (submission date).
- Sort direction: Oldest first or Newest first.
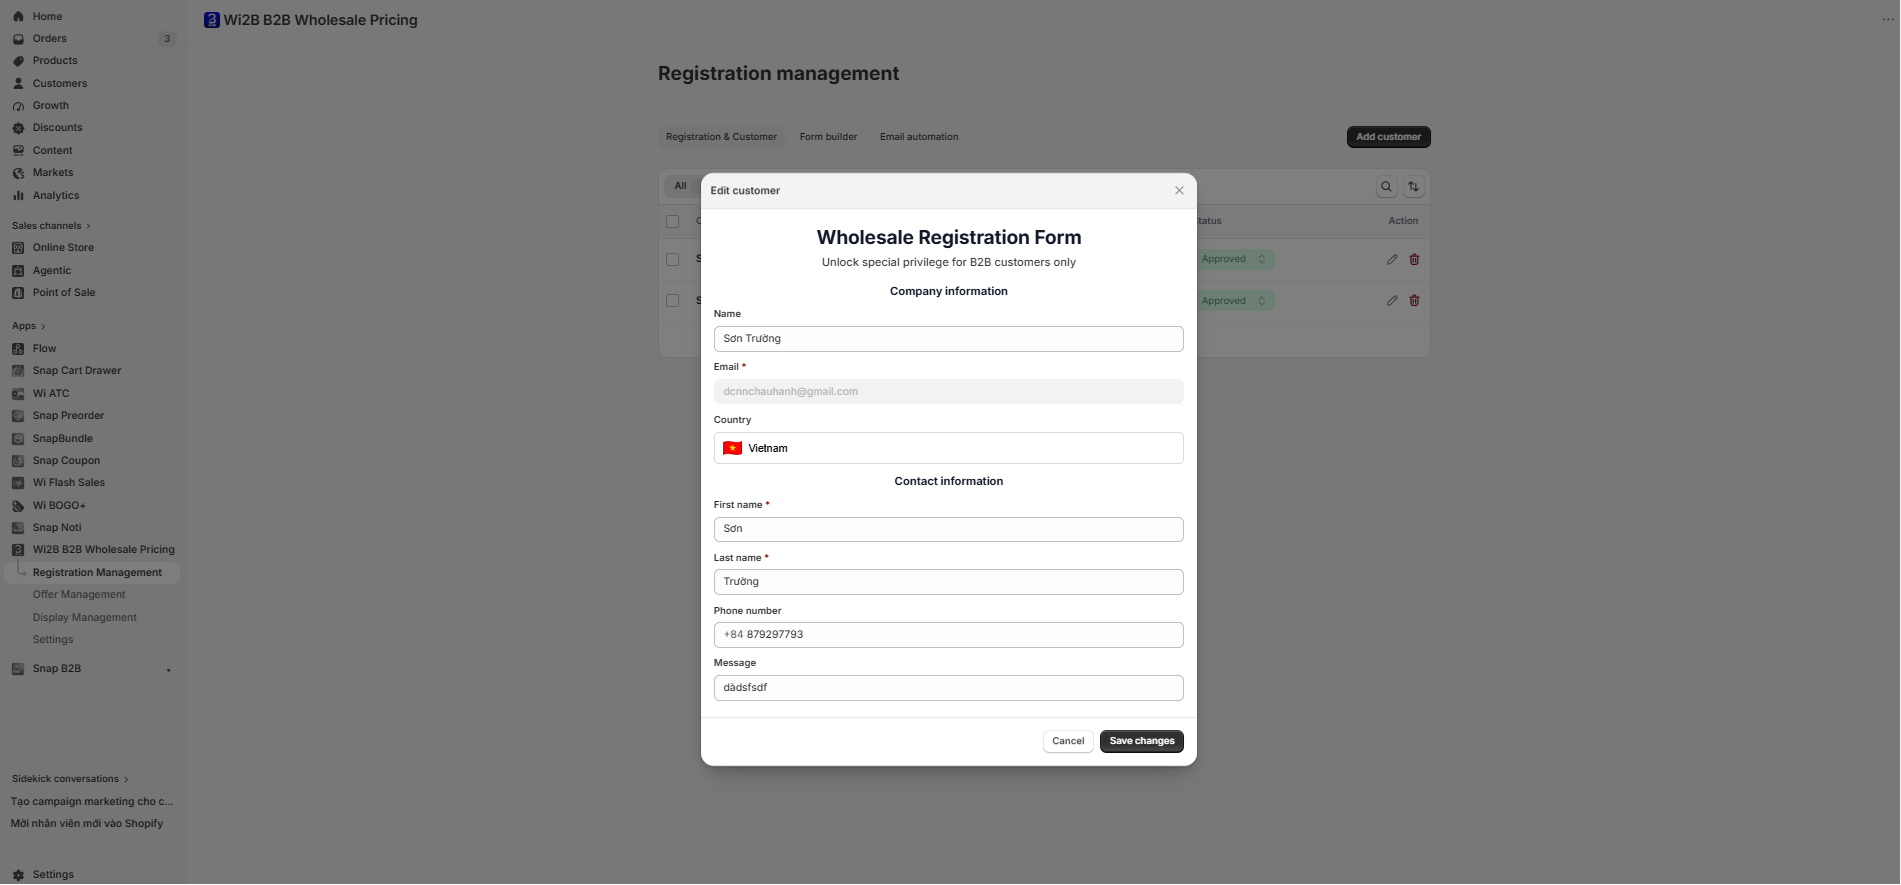
5. Edit Customer Information (Edit customer)
To modify a customer's submitted details, click the Edit (pencil) icon in the Action column of their row.
💡 Important Detail: The Edit customer popup dynamically displays the exact fields configured in your Form Builder (e.g., First name, Last name, Phone number, Country, Message...).
The Email* field serves as the customer's account identifier on Shopify and is set to read-only; it cannot be modified from this form.
Make the necessary updates and click Save changes to apply, or click Cancel to discard your edits.
6. Manually Add B2B Partners (Add customer)
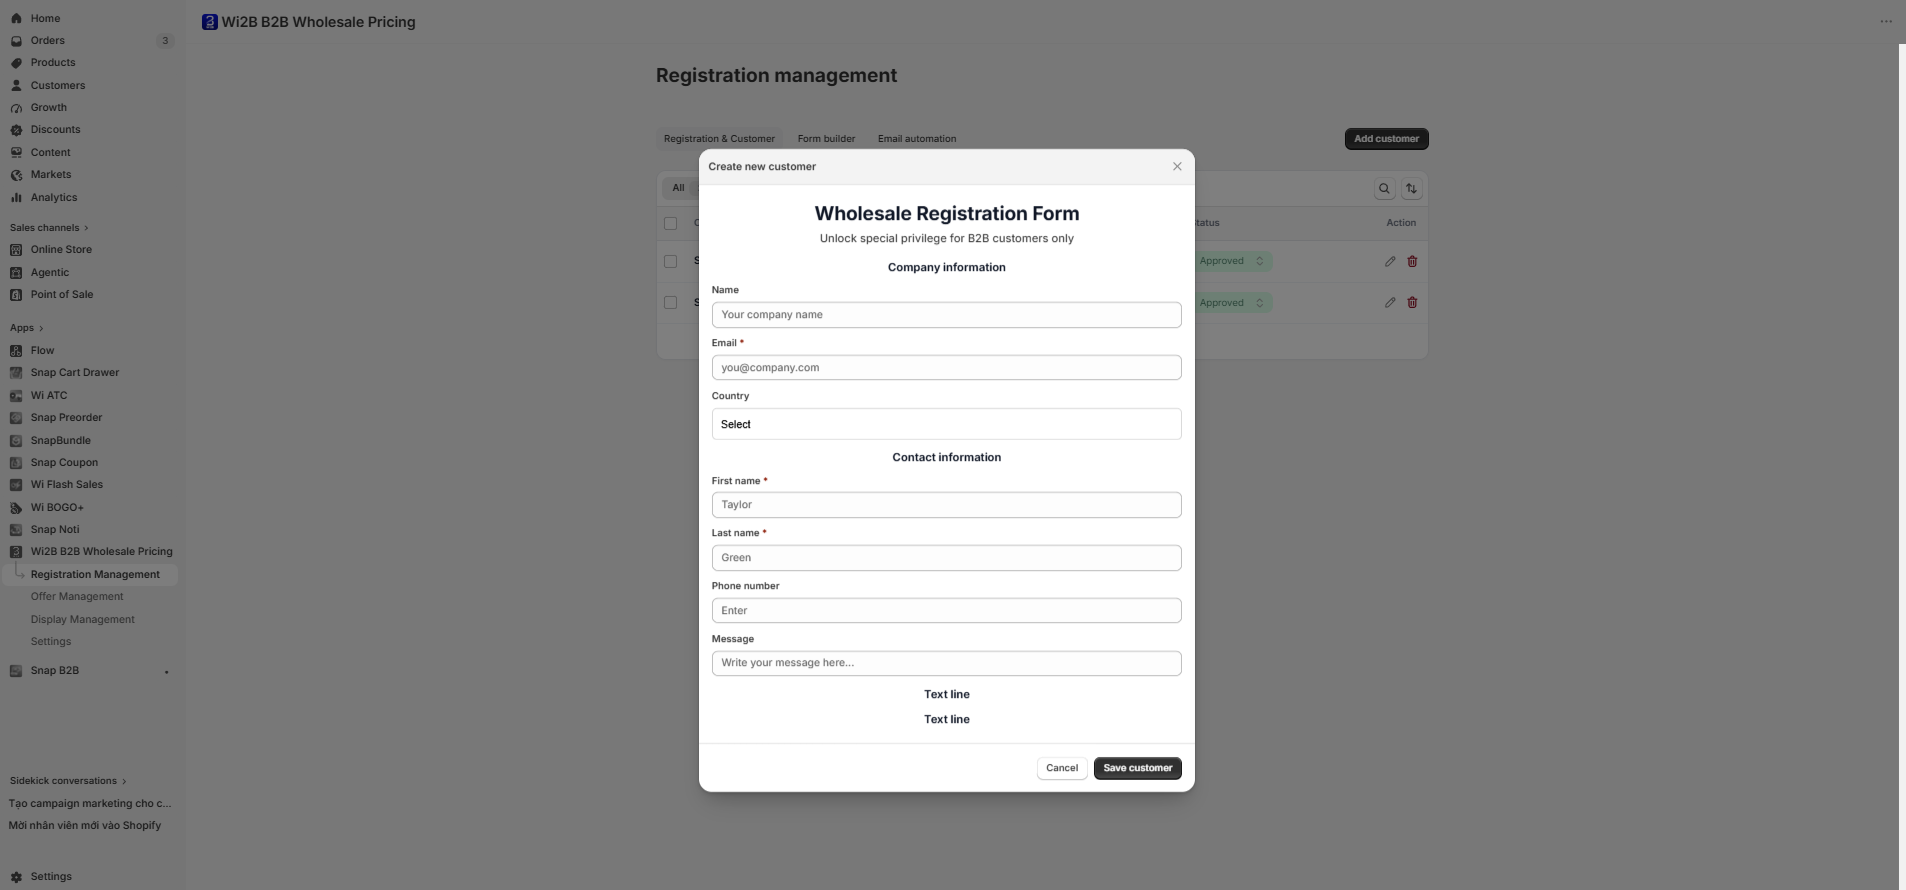
In addition to B2B partners applying online, you can manually create wholesale profiles directly from the admin panel by clicking the Add customer button in the top right.
- The Create new customer popup will open, rendering the exact fields currently defined on your Form Builder.
- Enter the B2B customer's details and click Save customer to create the profile, or Cancel to discard.
7. Delete Registrations
To remove an application from the app database, click the red Delete (trash bin) icon in the Action column of that customer's row and confirm the removal in the warning prompt.