
Configuring Automated Registration Emails (Email Management)
To make your B2B registration process seamless and professional, Wi2B can automatically send the right notification email to both you (the store owner) and your customers at every key step of the sign-up workflow. Once configured, the system handles all communications automatically.
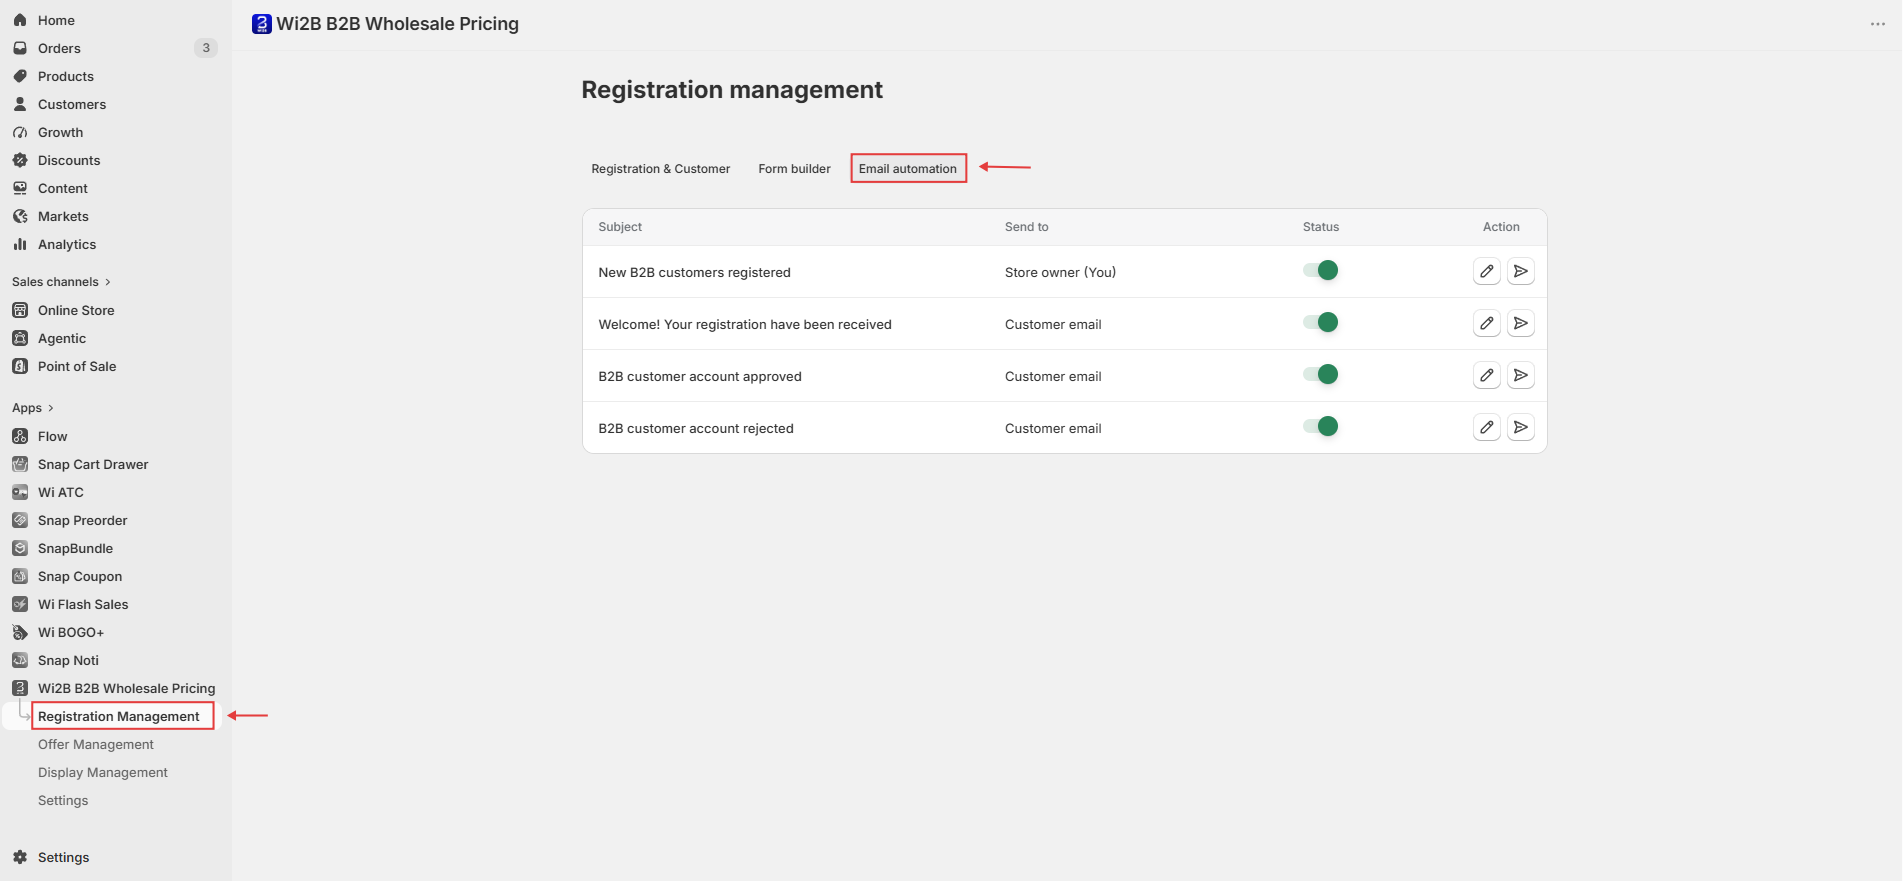
To access it, open the Wi2B B2B Wholesale Pricing app from your Shopify Admin > select Registration Management from the left navigation menu > click the Email automation tab from the top navigation bar.
1. Meet the 4 Automated Email Templates
The Email management page lists four ready-to-use email templates, each serving a different purpose in your registration workflow:
| Sent to | Triggered when | |
|---|---|---|
| New B2B customers registered | Store owner (Merchant) | A new B2B registration is submitted |
| Welcome! Your registration have been received | Customer | A customer successfully submits their registration form |
| B2B customer account approved | Customer | You approve their B2B registration request |
| B2B customer account rejected | Customer | You reject their B2B registration request |
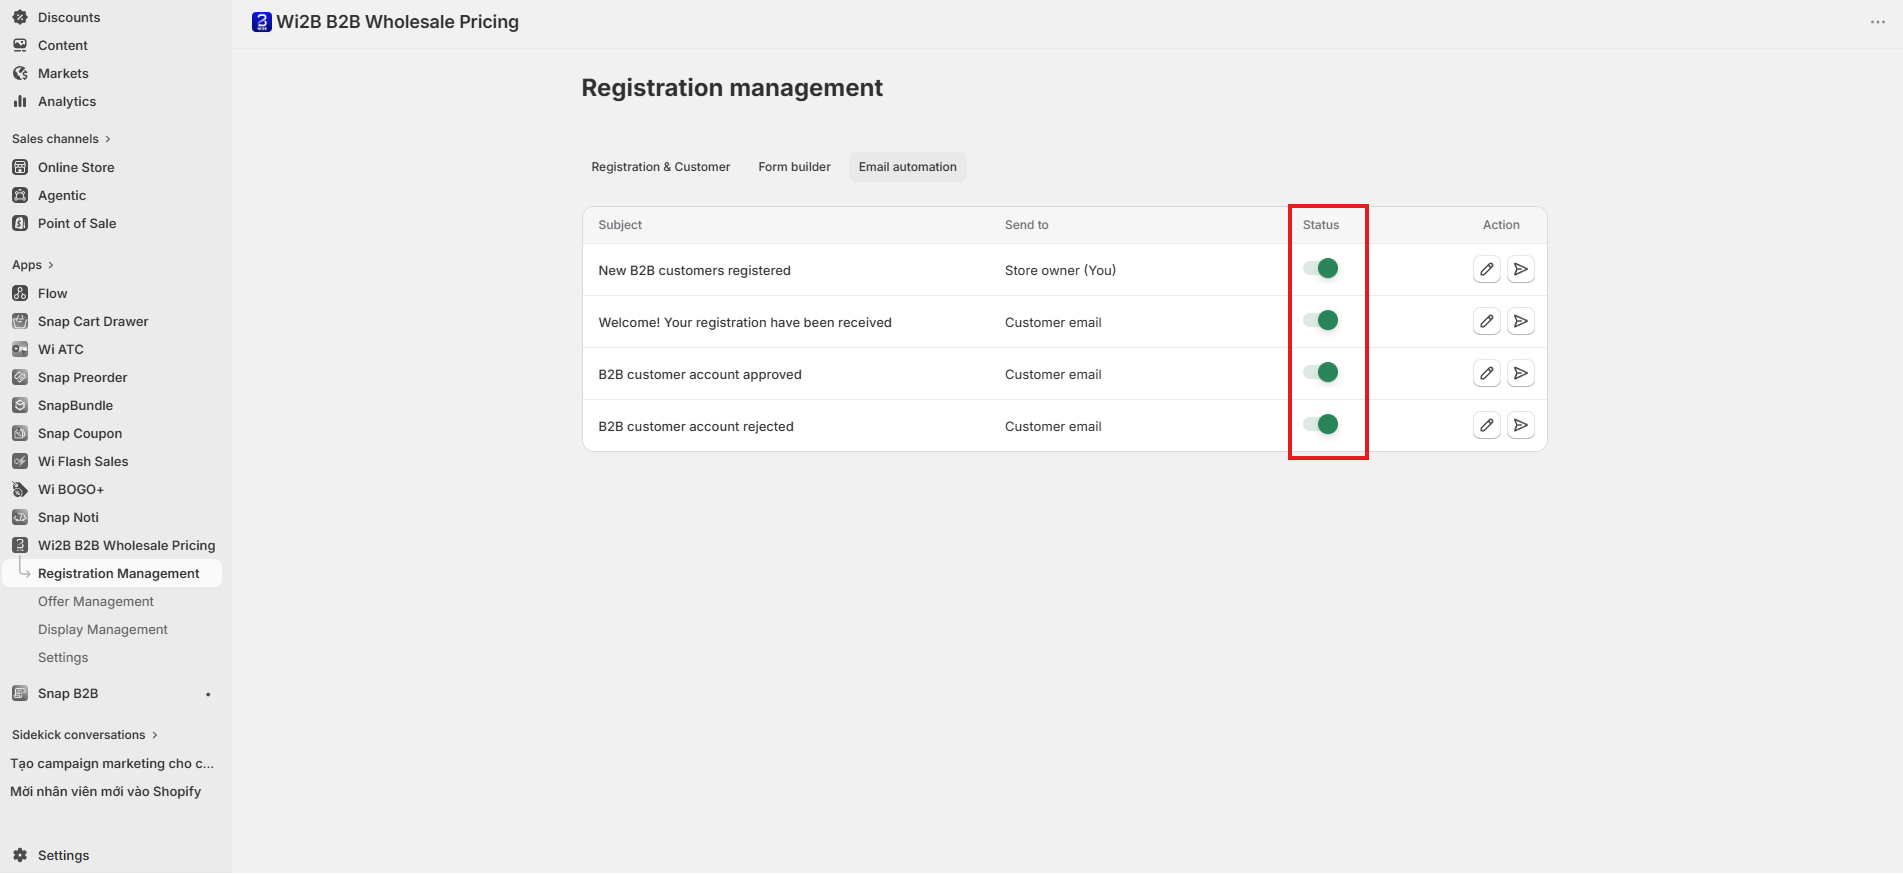
On the main dashboard list, the Status column displays a toggle for each email. You can activate or deactivate these templates independently based on your store's workflow.
2. Configure Recipients and Content
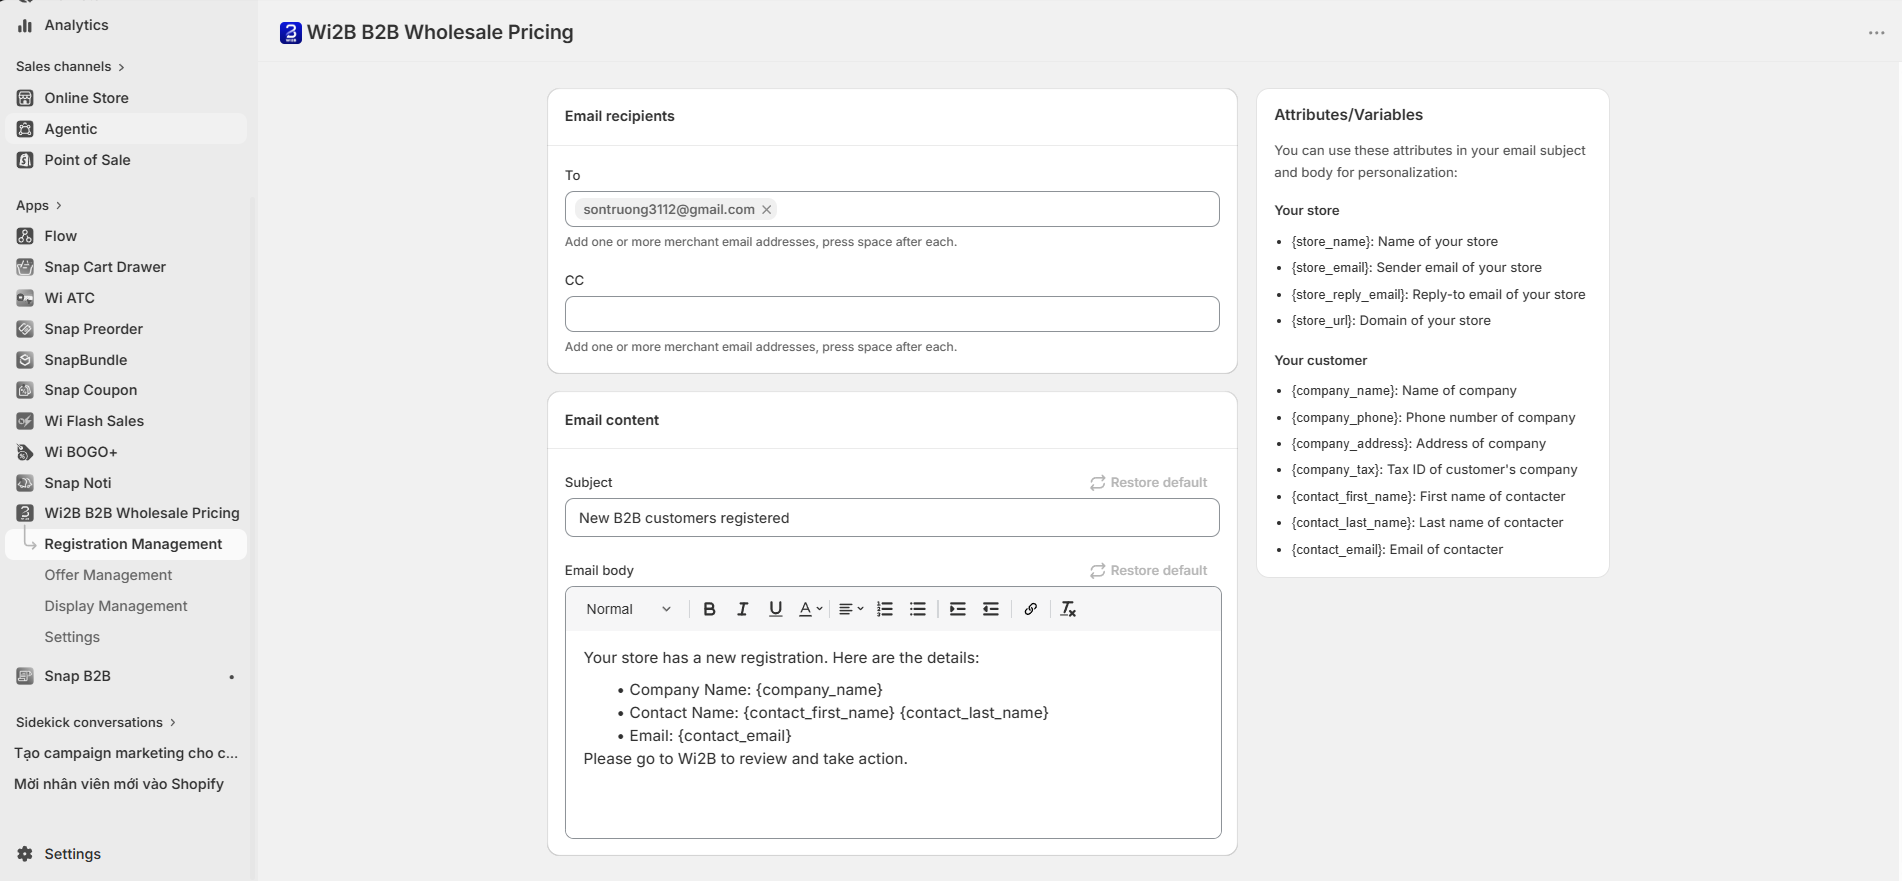
To edit any email template, click the Edit icon (pencil) in the Action column of that row.
For the Store Owner Notification (New B2B customers registered)
The editing screen includes an Email recipients section at the top:
- To: Enter one or more merchant email addresses to receive the alert. Press space after each address to add it.
- CC: Enter additional recipient emails to copy on the message.
For Customer-Facing Emails (the other 3)
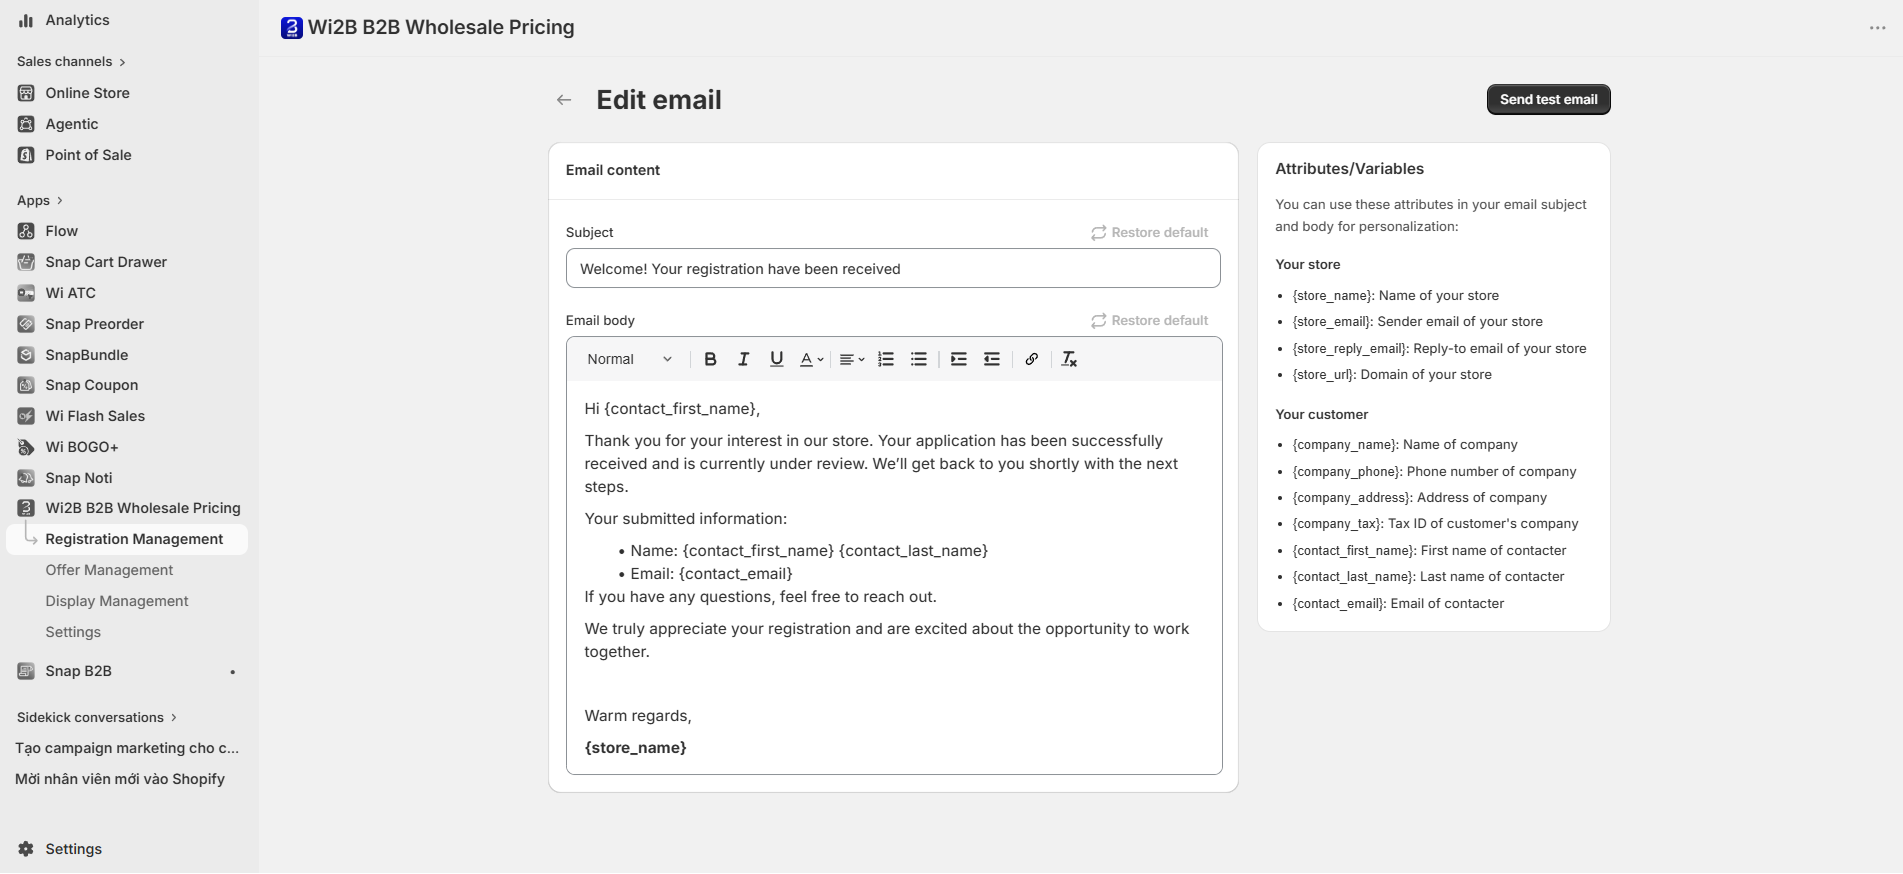
Since the app automatically routing emails to the applicant's email address, you only need to focus on editing the content:
- Subject: The subject line displayed in your customer's inbox.
- Email body: The main text of your message. Use the editor toolbar to format text (bold, italic, underline, color, align) or insert clickable links.
- Restore default: If you want to undo changes and go back to Wi2B's original template, click the Restore default link (with a refresh icon) next to the Subject or Email body labels.
3. Personalize Emails with Dynamic Variables (Attributes/Variables)
On the right side of the editor screen, the Attributes/Variables panel lists dynamic placeholders you can insert into the Subject or Email body. The system automatically replaces these variables with the actual store and customer data during delivery:
Store Parameters (Your store)
{store_name}— Name of your store.{store_email}— Sender email of your store.{store_reply_email}— Reply-to email of your store.{store_url}— Website domain of your store.
Customer Parameters (Your customer)
{company_name}— Name of company.{company_phone}— Phone number of company.{company_address}— Address of company.{company_tax}— Tax ID of customer's company.{contact_first_name}— First name of contacter.{contact_last_name}— Last name of contacter.{contact_email}— Email of contacter.
Example: Instead of writing a generic "Dear customer", you can write Hi {contact_first_name}, so the system automatically addresses each customer by their first name (e.g. Hi Son,).
4. Send a Test Email (Send test email)
Before going live, it is highly recommended to send a test email to check formatting:
- Method 1 (From the list view): Click the Send test email icon (paper airplane) in the Action column of the corresponding email row.
- Method 2 (From the edit screen): Click the black Send test email button in the top-right corner.
A popup will prompt you to enter a test recipient email address. Enter your email and click send to test.
Help & Support
If you run into any issues while configuring your emails, reach out to our support team at help@wi2b.com or via our live chat for prompt assistance.