
Setting Up and Managing Your Offer Sets with Wi2B
An Offer Set is the core tool in Wi2B designed to automate your B2B promotions and wholesale pricing campaigns. Instead of building multiple complex discount codes, you can bundle product pricing rules and checkout order thresholds into a single Offer Set and target specific customer groups.
Before You Start
To set up your offer sets quickly, prepare these details in advance:
- Target Customers: Decide which wholesale group receives the promotion (e.g. B2B partners carrying the tag
wi2b-b2b, or logged-in users). - Discount Strategy: Choose which products will be discounted and specify the discount rates (either flat discount rates or volume tiers).
Step 1: Create a New Offer Set
- Log in to your Shopify Admin.
- Open the Wi2B B2B Wholesale Pricing app.
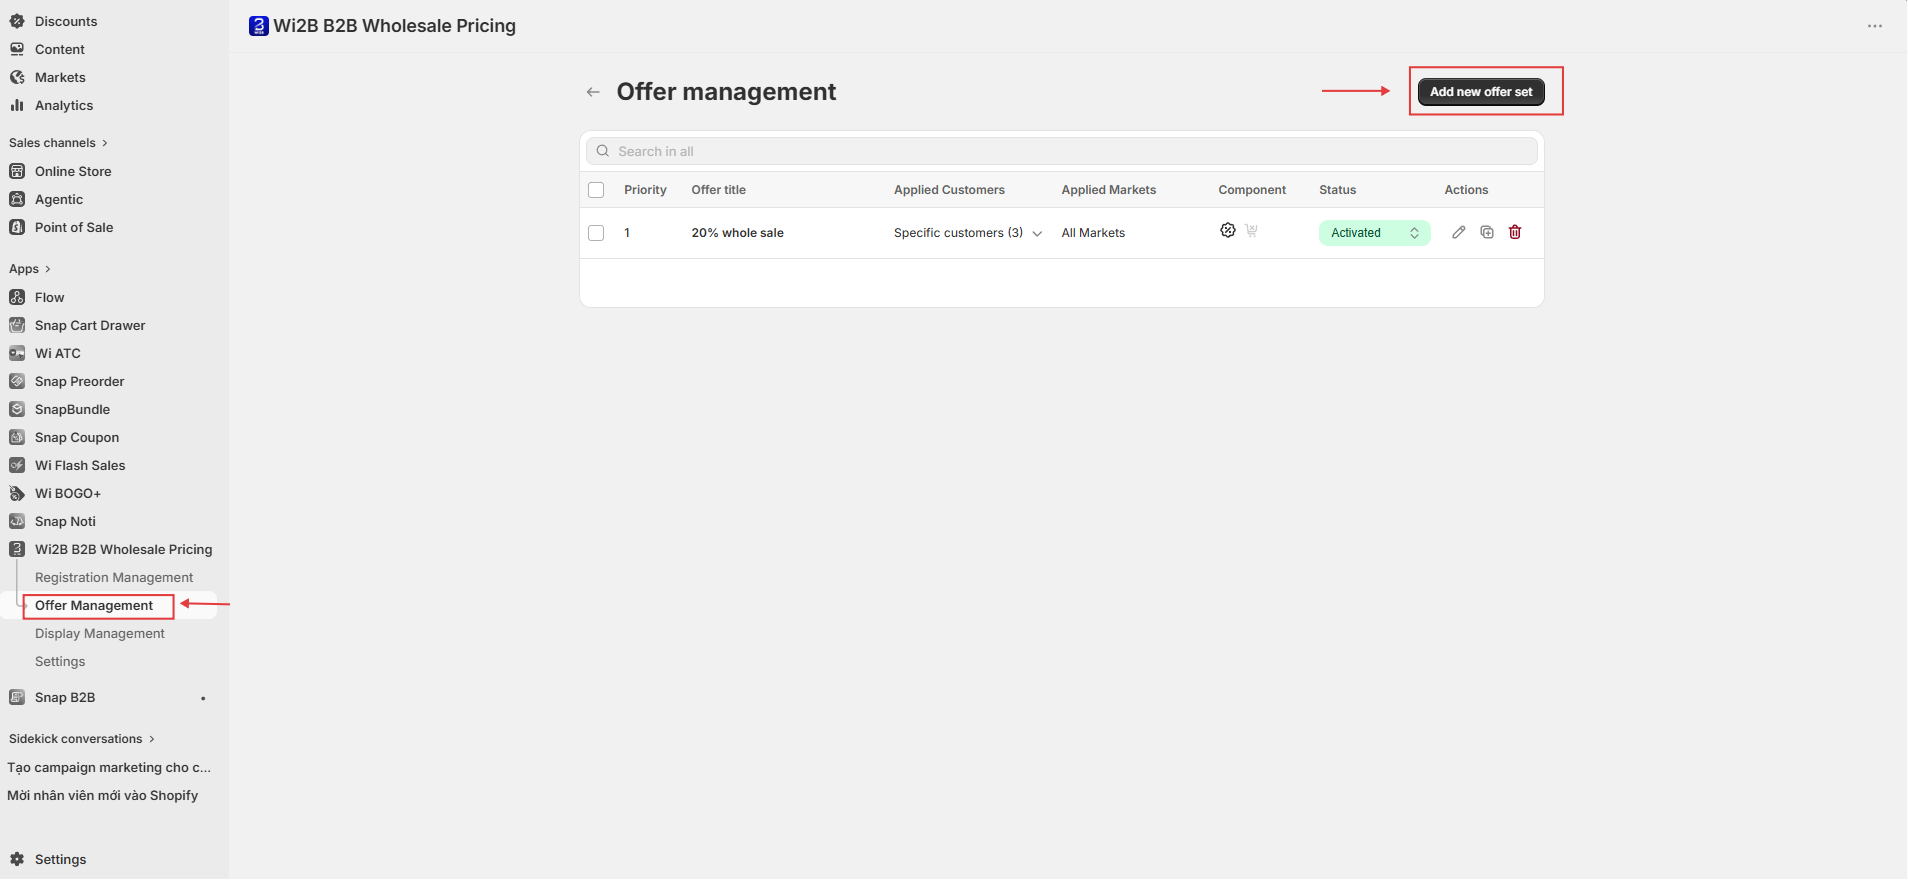
- Select Offer Management from the left navigation sidebar.
- Click the Add new offer set button at the top right of the dashboard.
Step 2: Configure General Settings
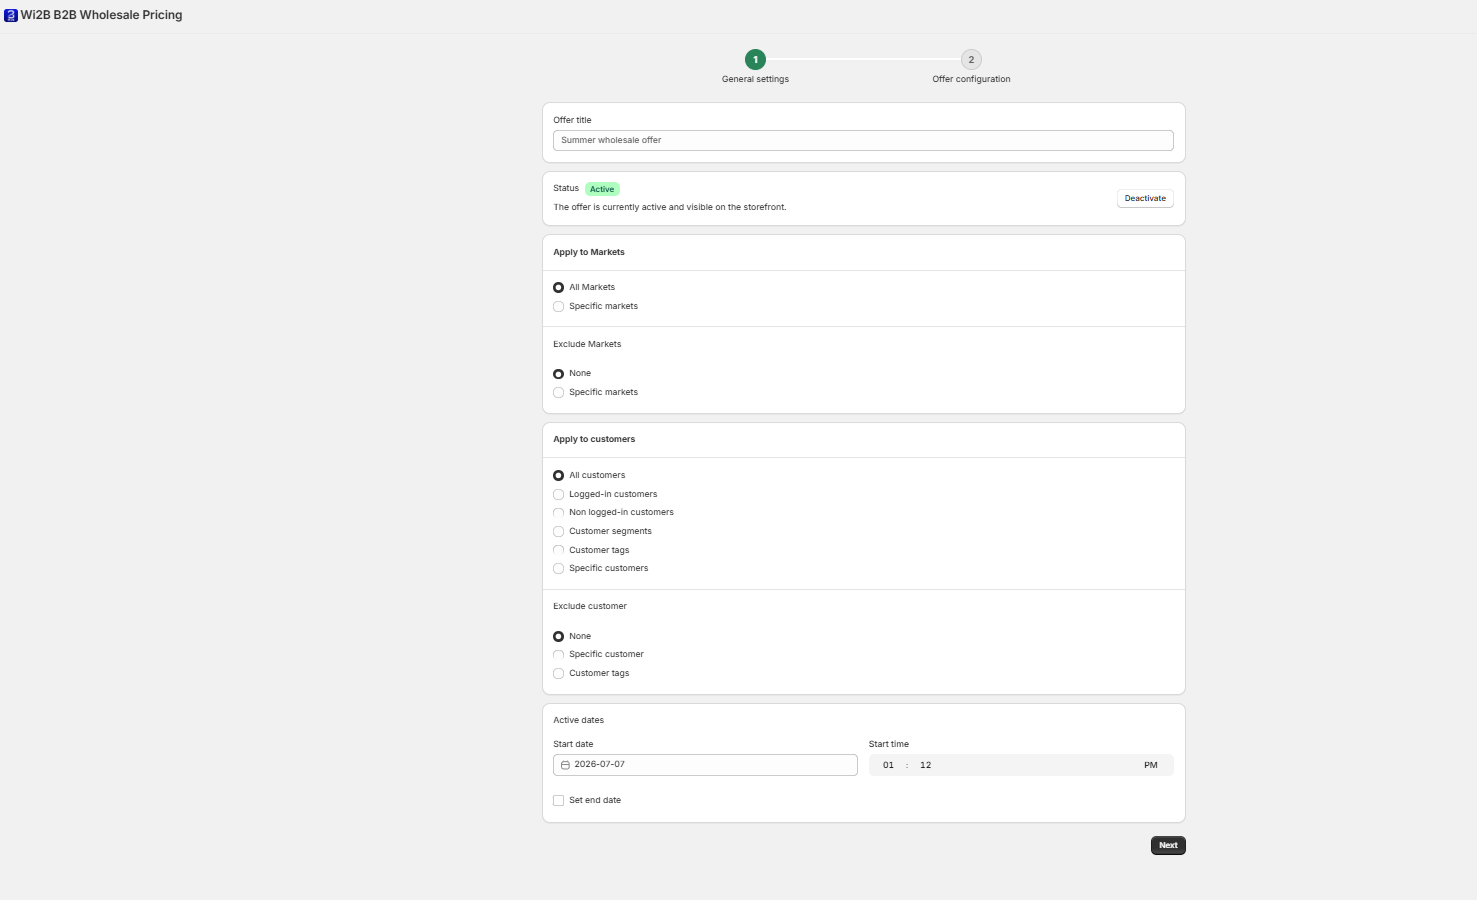
In the General settings step (Step 1), configure the high-level campaign details:
- Offer title: Enter a name for the offer (this is for your internal management only).
- Status: Toggle the switch or click Deactivate (a green Active badge indicates that the offer is active and visible on the storefront).
- Apply to Markets: Select All Markets to apply to all active markets on your store; or select Specific markets to open the search bar and select target countries (e.g. Spain, Vietnam...).
- Apply to customers: Select All customers to target all store visitors; or select one of the detailed options: Logged-in customers, Non logged-in customers, Customer segments, Customer tags (such as B2B tags like
wi2b-b2b), or Specific customers. - Active dates: Set the promotion duration including start date, start time, and end date (check Set end date to enable).
Click the Next button at the bottom right to proceed.
Step 3: Configure Offer Rules (Offer configuration)
In the Offer configuration step (Step 2), define the detailed rules across the two configuration tabs:
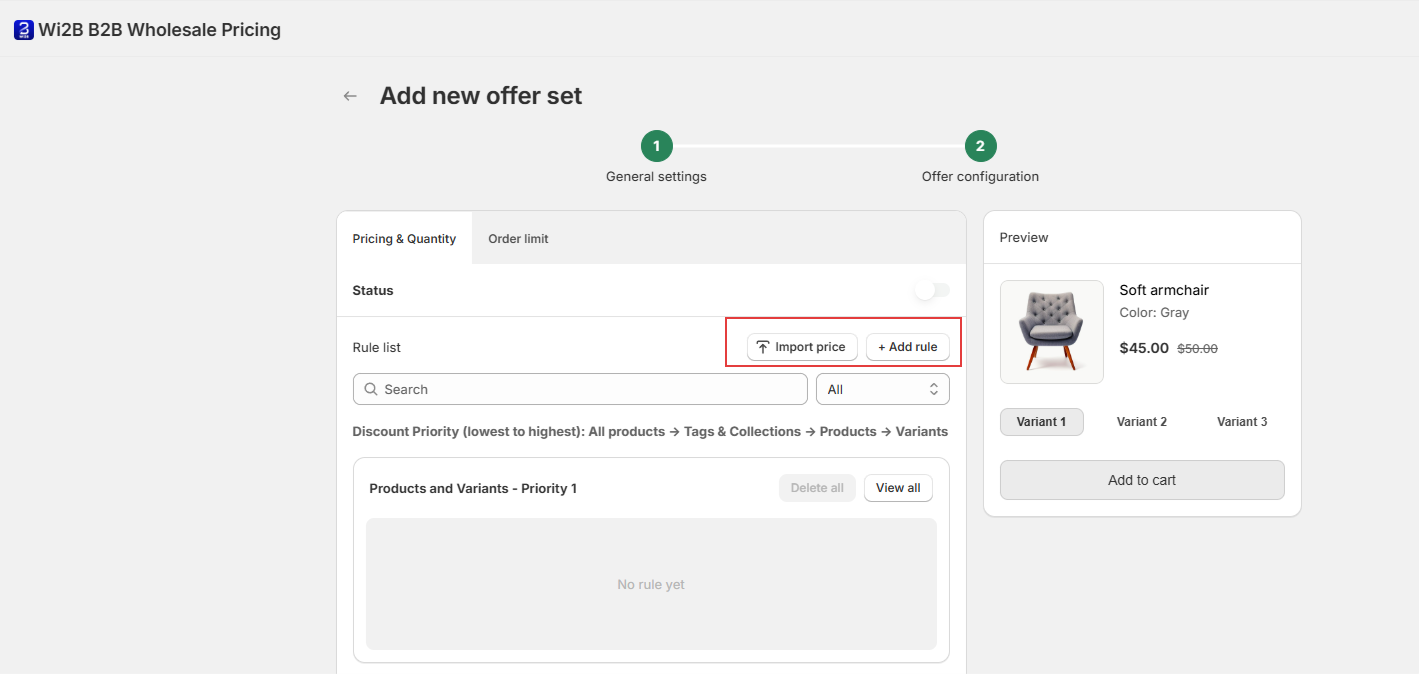
3.1. Pricing & Quantity Tab
Set up product discounts for your B2B customers:
-
Click + Add rule to open the rule creation page.
💡 Tip: If you want to upload wholesale prices in bulk instead of creating rules one by one, click the Import price button. For detailed instructions, see our Guide to Importing Wholesale Prices.
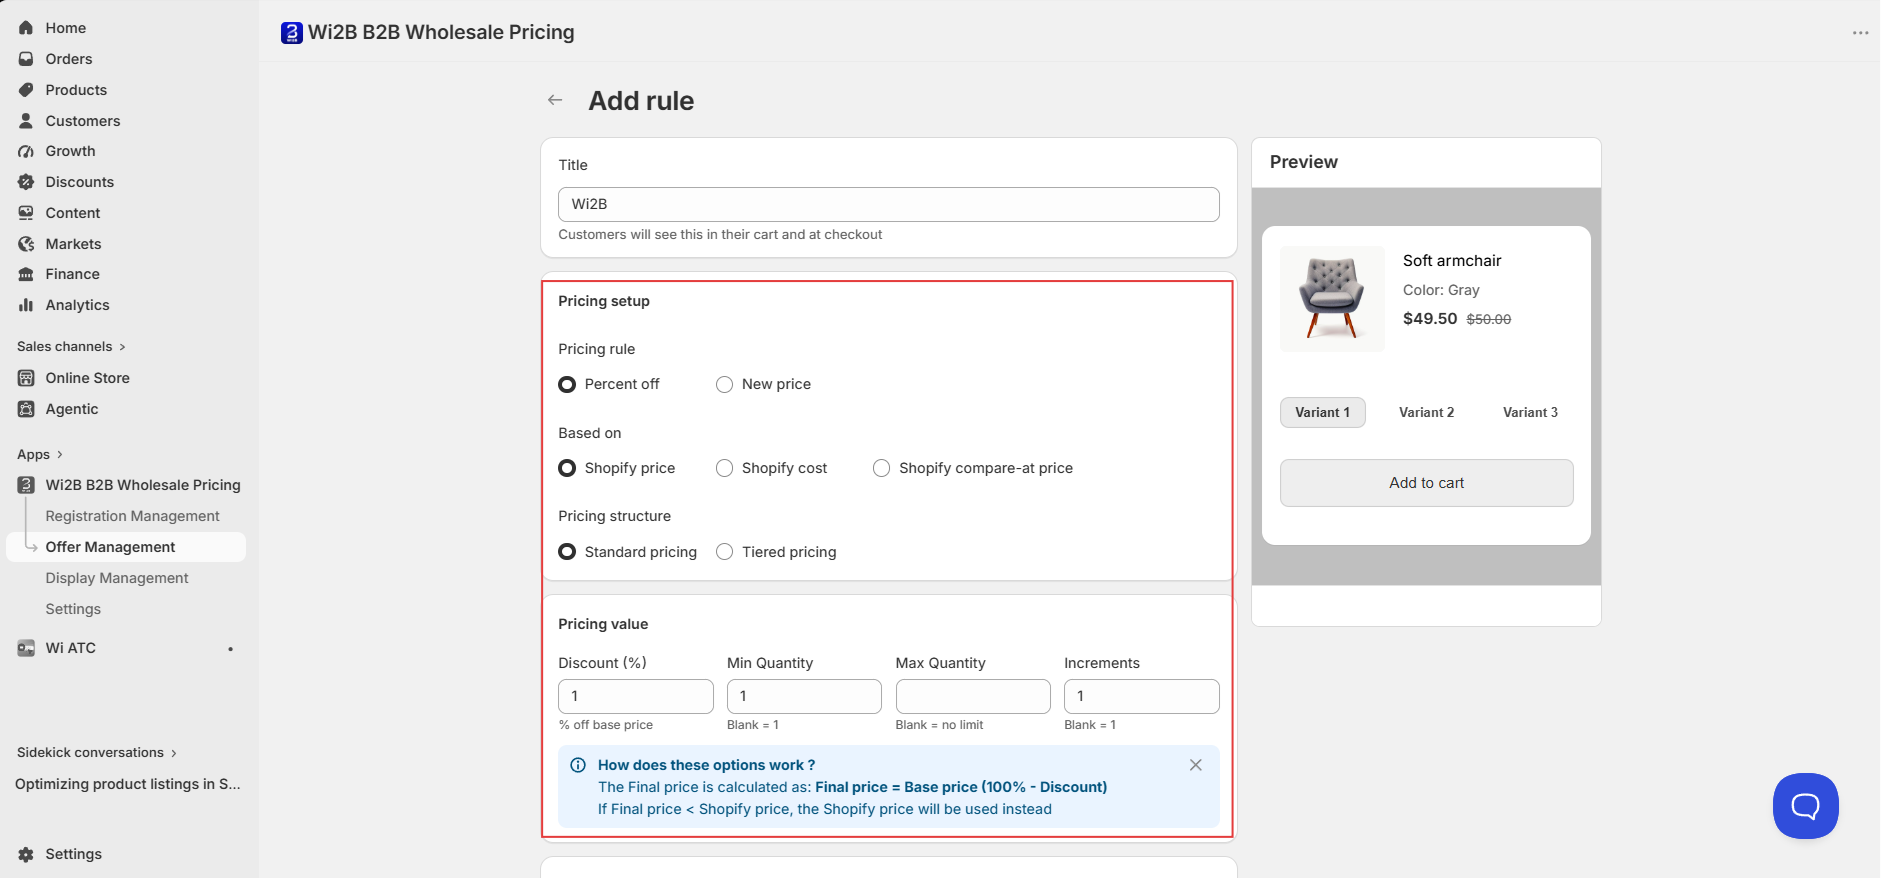
- On the Add rule page, configure the following settings:
- Title — Enter a discount title visible to your B2B customers in their cart.
- Pricing rule — Choose Percent off (percentage discount) or New price (fixed wholesale price).
- Based on — Choose the base price (Shopify price, cost, or compare-at price).
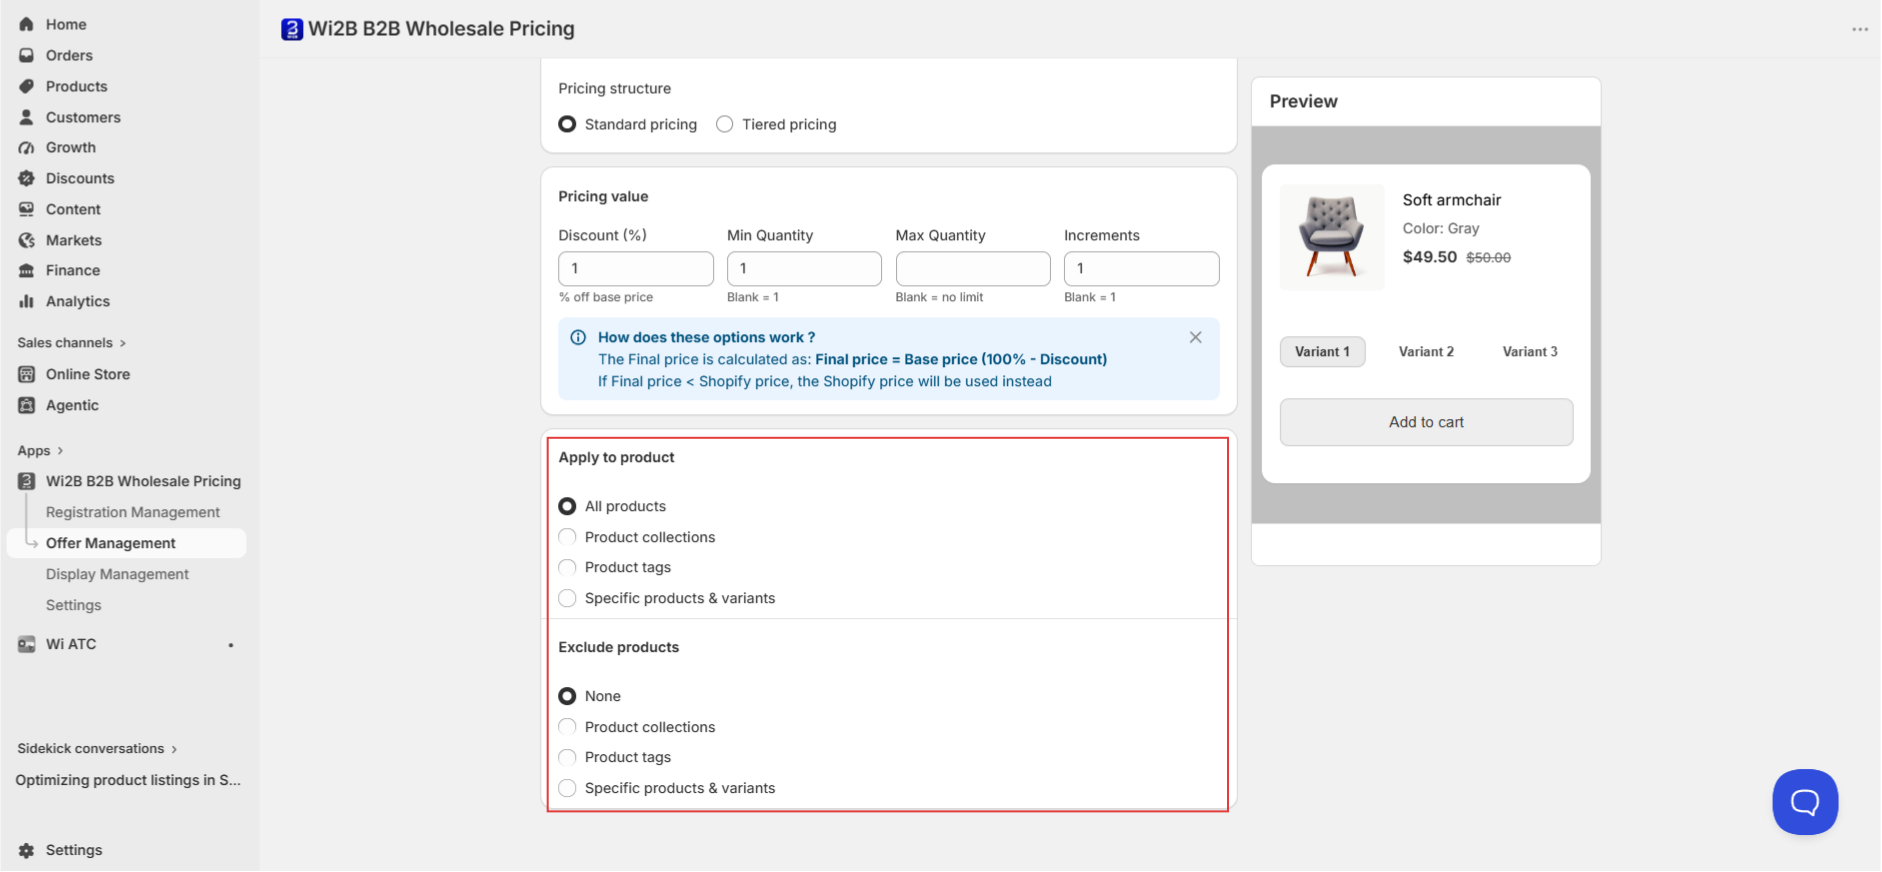
- Pricing structure — Choose Standard pricing (flat discount) or Tiered pricing (volume breaks).
- Pricing value — Enter your discount percentage or new price, along with Minimum Qty, Maximum Qty, and Increments. For Tiered pricing, click + Add Tier to add multiple breaks (e.g. buy 1-2 get 10% off, buy 3+ get 20% off).
- Apply to product — Choose target products (All products, Product collections, Product tags, or Specific products & variants). If selecting All products, you can exclude specific items using the Exclude products field.
ℹ️ Pricing Formula: The final price is calculated as:
Final price = Base price * (100% - Discount). If the calculated Final price is lower than the Shopify cost, the Shopify cost will be used instead (to prevent selling below product cost).
-
Click Save (or the back arrow at the top left) to add the rule to your Offer Set.
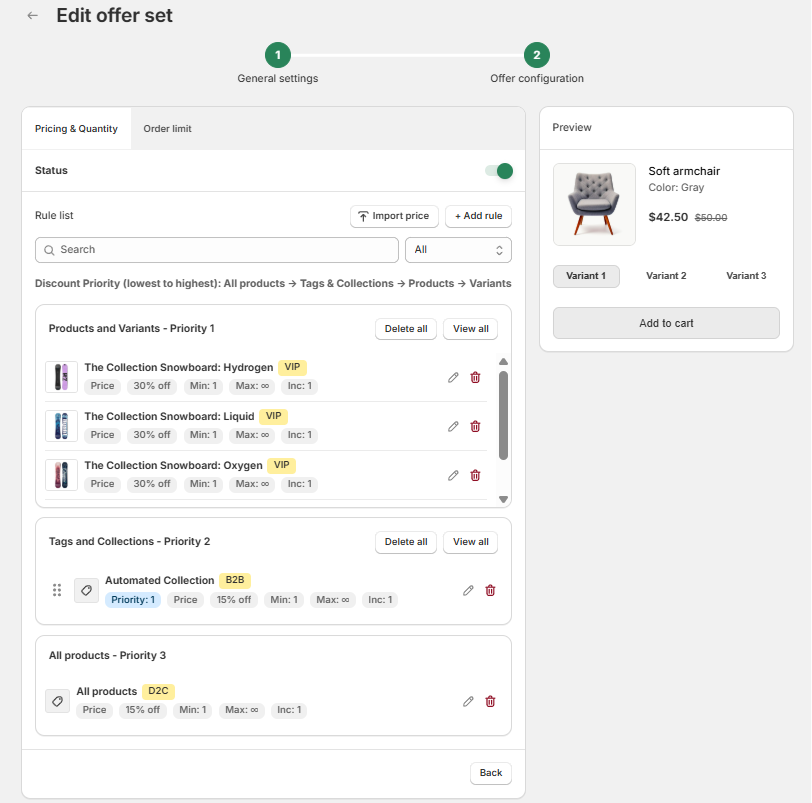
Discount Priority — Saved rules are automatically organized by scope priority on the screen:
- Products and Variants (Priority 1 - Highest)
- Tags and Collections (Priority 2)
- All products (Priority 3 - Lowest)
The system evaluates rules starting from the highest priority (Priority 1) down to the lowest (Priority 3).
3.2. Order Limit Tab
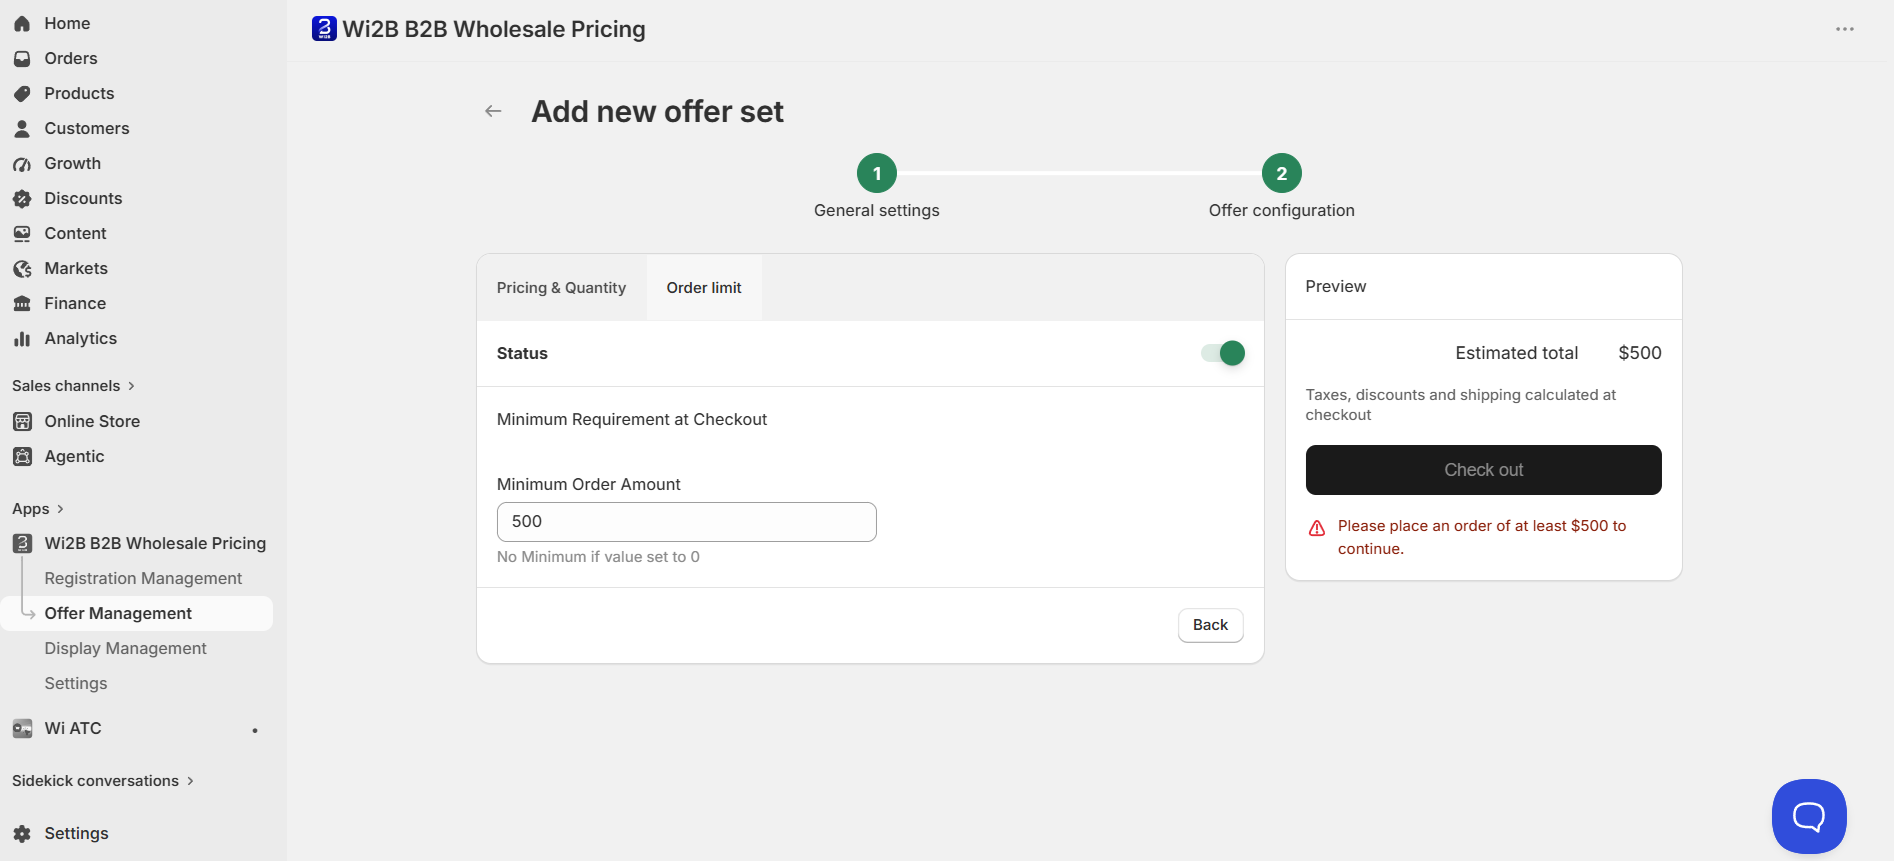
Require customers to meet a minimum order threshold before they can complete a B2B checkout:
- Click the Order limit tab.
- Toggle the Status switch to active (turns green).
- Under Minimum Requirement at Checkout, enter your threshold in the Minimum Order Amount field (Set to 0 to disable).
- Review the live checkout warning message in the Preview panel on the right.
Step 4: Save and Complete Setup
- Review the entire configuration summary in the live Preview panel on the right.
- Click Save at the top right of the workspace to publish the Offer Set.
Managing Your Offer Sets
On the main Offer Management dashboard, you can perform quick actions:
- Change Priority — Click and hold the six-dot handle on the left of any row and drag it up or down to change the priority order.
- Toggle Status — Click the toggle in the Status column to quickly activate or deactivate an Offer Set.
- Actions Column — Click the pencil icon to edit, the double-sheet icon to copy, or the red trash bin icon to delete the Offer Set.
Need More Help?
If you experience any issues or have questions, please don't hesitate to contact our support team at help@wi2b.com or through our live chat - we're here to assist you!